
This post contains affiliate links, which means I make a small commission on sales generated through such links. Read my FTC disclaimer for more information.
If you are a blogger, business, brand, product or have a website, you bet you want to make sure you add that website to your Pinterest profile. If you don’t yet have a business profile, you can create one for free or convert your personal Pinterest account to a business account. You will also want to claim your website and I am going to teach you step by step how to claim your website on Pinterest easily. No coding experience is needed!
Want to start a blog from scratch without hiring a web developer? Find out how to start a blog!
How to Claim Your Website on Pinterest
This tutorial is for those on the WordPress platform. You might have the Yoast SEO plugin already, but if you don’t, you will want to download and activate this free plugin. The Pro version of Yoast SEO is not necessary, but if you plan to have a website with good SEO, I do recommend the Pro version at some point.
Since this tutorial is about claiming your website on Pinterest and not about SEO, I will be referring to the free version of Yoast. The Pro version has the same features that I will be discussing today.
- Create a Business Account
If you haven’t done so already, you will want to create a business account or convert your personal account to a business one. This is fairly easy to do. You can follow these steps to get a Pinterest business account. Once you have a business account set up, you are ready to claim your website.
2. Log into your Pinterest account. When you are logged in and on your profile, it should look like this:
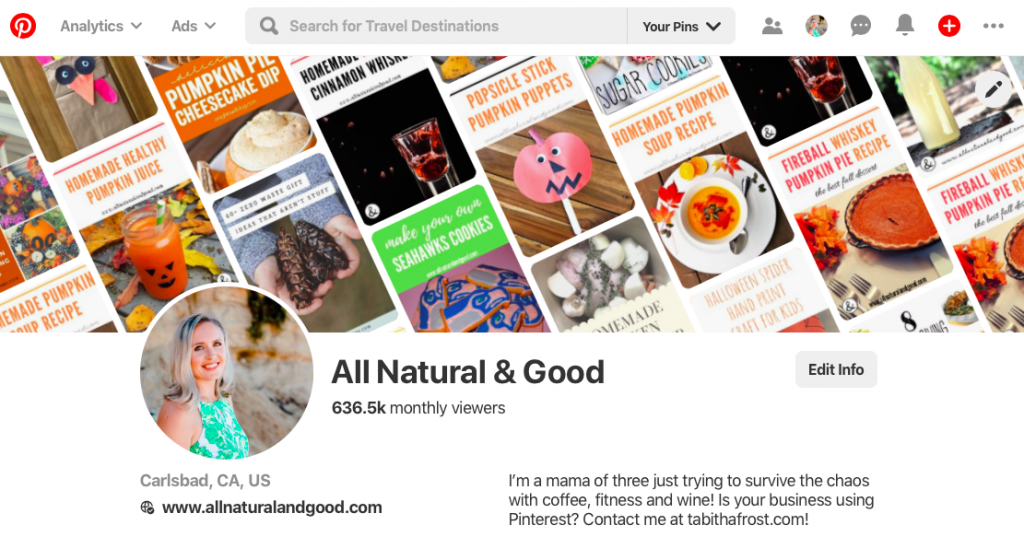
As you can see under my profile picture and location, there is my website with a globe and check mark icon to the left. This is the icon that means my website is claimed.
3. Next you will want to go to “edit settings” then click on “Claim” on the left as shown:
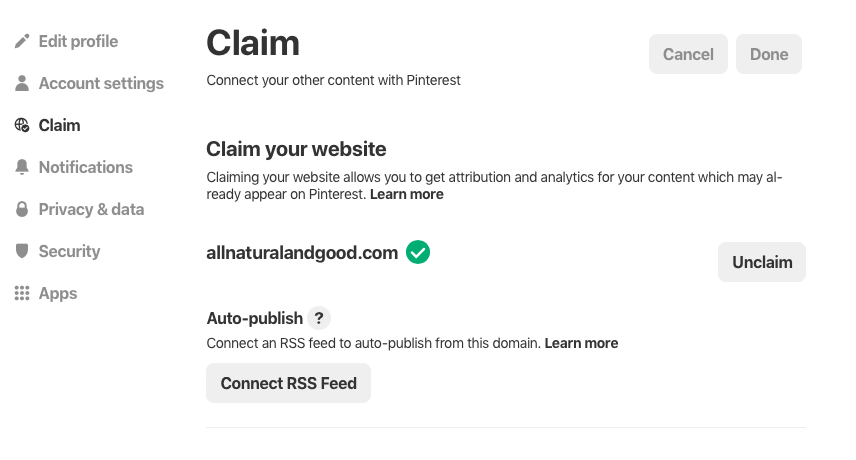
4. Since mine is already claimed, I am going to talk you through the remaining steps. There will be a button to “claim” your website in place of “unclaimed” in the above picture. Click on “claim”. There will be two ways to claim your site. Select the first option that says “add html tag” to the <head> of your website. Copy this code.
I know it sounds overwhelming, but trust me that there is an easy way to do this through Yoast SEO. If you are not a coder, please do not attempt to add code to your website and risk breaking your site.
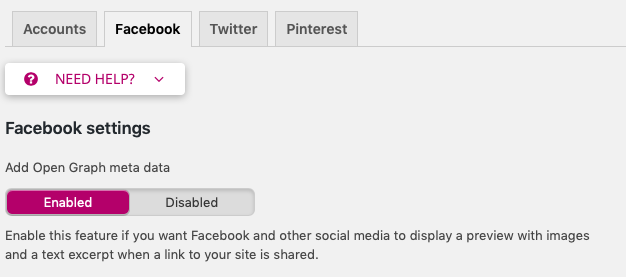
5. Next, you will want to go to your Dashboard on WordPress, hover over the Yoast SEO icon in the left sidebar and then click on “social”.
6. Click on “Facebook” and make sure the Open Graph meta data is enabled as shown:
7. Click on “Pinterest” and paste the code you copied into the box that says “Pinterest confirmation”.
If you followed all of the steps above correctly, your website should be successfully claimed on your Pinterest business account. Pinterest should email you within 24 hours to confirm that your website is now claimed.
Now that you are on Pinterest representing your brand, it is time to start marketing like a pro on Pinterest!
